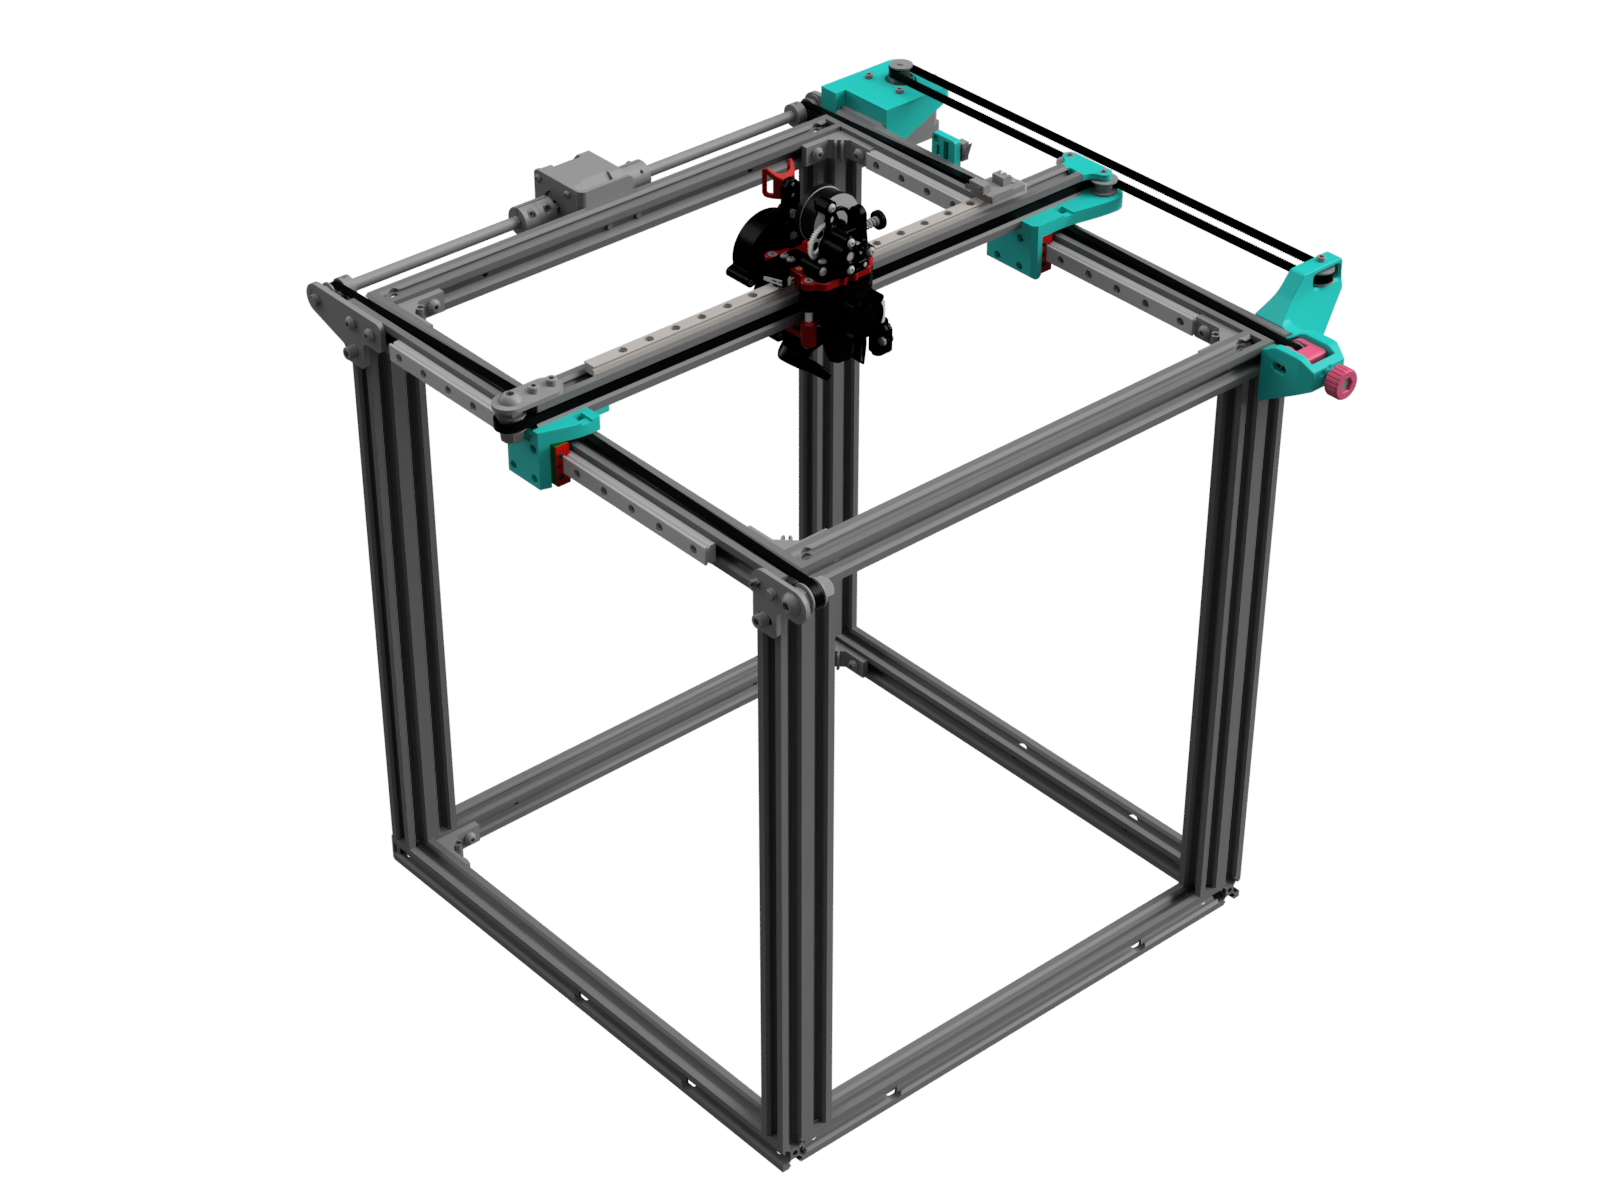
Stage 3: Linear X Rail
The purpose of this stage is to add a linear rail on the X axis. We’ll basically be trading the weight from the original steel printhead carriage and its wheels for an MGN9 rail of similar weight (on the plus side, in the Hybrid CoreXY configuration the weight will now be shared between the two stepper motors). Thus, the benefits of this stage aren’t as much weight removal as the ability to use a modern printhead such as the Ratrig EVA or the Vz Printhead, plus complete liberation from those frustrating v-slot wheels.
Bill Of Materials
Linear Rails
Bolts
| Part | Type | Quantity | Link |
|---|---|---|---|
| M3x8 socket head | ISO 4762, DIN 912 | 8 | Amazon |
T-Nuts
| Size | Quantity | Link |
|---|---|---|
| M3 2020 T-nuts | 8 | Amazon |
Printing
STL files for this stage are here
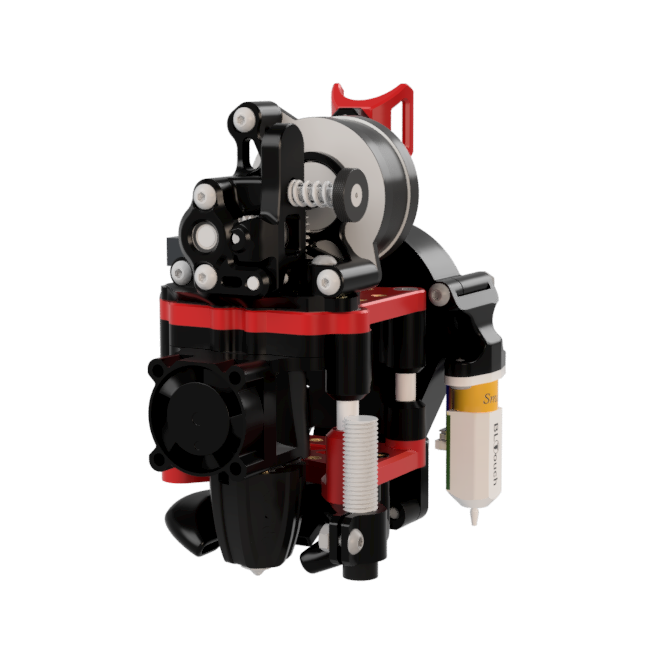
Vz Printhead
Usable Print Area: 220 x 200 (20mm reduction on Y axis)
The Vz Printhead is an impressively simple printhead used on the blazing fast VzBot printer. It has all the features you’d expect from a modern printhead including many popular hotends, extruders, and Z probes (BLTouch and SuperPINDA). It also as well as some less-common features like adjustable-height fan ducts and CPAP cooling.
The only drawback with this printhead is that you may not already have the 30mm standoffs on hand to complete the build (< $10 with shipping).
The official design only required three parts to be modified in order to work on the Endorphin. So start by downloading the official STLs from here and you can find the BOM here. Then before you start printing parts, check the table below and substitute any of the original parts listed below with the Endorphin part:
| Original Part | Endorphin Part |
|---|---|
| Back plate round standoff.stl | vz-back_plate.stl |
| Bottom plate round standoff.stl | vz-bottom_plate.stl |
| Front round standoff.stl | vz-front.stl |
Make sure you print the MGN9H version of the carriage top (assuming you bought your rails from the links above) rather than the MGN9C version.
Belt Clips
Either of the following belt clips provided with the printhead will work fine so pick whichever one you prefer. The original Vz printhead has been modified so that the posts sit at the right height for the Endorphin belts. Just remember that you only need to print off clips for 2 belt ends rather than the 4 needed in a CoreXY, which means you can choose whether you want to attach the belt ends on the front or rear posts (just don’t do one front and one rear). The other side will be unused.
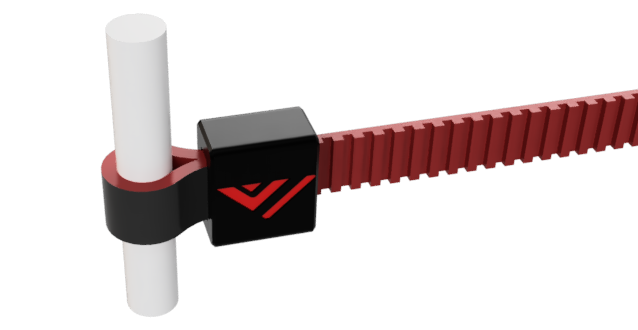
Belt Clip Style 1
This clip is incredibly simple to print and the gripping mechanism is equally simple: By circling the belt around the standoffs, teeth inward, the belt grips itself by interlacing its own teeth like a zipper. This is probably the best choice in terms of printability and simplicity.
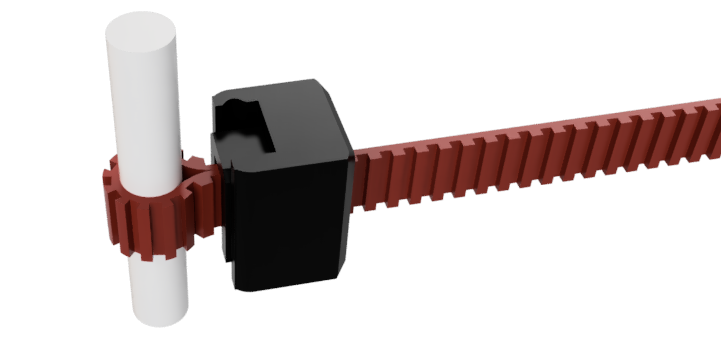
Belt Clip Style 2
This is a two-part clip that has more intricate details to print, so make sure to use a small enough nozzle and/or thin layers. While also a clever design, it does look like the wings on the outer clip housing run the risk of spreading under enough tension and allowing the belt to slip.
EVA
Usable Print Area: 220 x 190 (30mm reduction on Y axis)
The EVA printhead is the standard Ratrig printhead. It has a large number of official addons including fan ducts, hotends, and extruders as well as even more parts created by the community. The main downside of this printhead is that its size causes about 10mm more lost print space on the Y axis than the Vz.
The official EVA v3 design only required three parts to be modified in order to work on the Endorphin, so you can start by reading up on the official CoreXY printhead and downloading most of the parts from this page. Just substitute the following parts for the Endorphin versions in this table:
| Original Part | Endorphin Part |
|---|---|
| back_core_xy_fi.stl | eva-back_endorphin.stl |
| core_xy_belt_grabber.stl | eva-endorphin_belt_grabber.stl |
| top_endstop_mgn12c_fi | eva-eva-mgn9h.stl |
You also don’t need to print face_belt_grabber.stl because the Endorphin doesn’t have a belt that attaches to the front of the EVA in the same way that a CoreXY does.
After you’ve printed the core printhead, you can choose the fan duct, hotend, and extruder that suits you. If you don’t see your preferred parts on the official site, make sure to check sites like printables for what you need.
Credit for eva-mgn9h.stl goes to @andbou_260448
Cable Guide
Let’s clean up the cable pathway for your nice new printhead. This is a simple one to print and only needs one M3 T-nut to secure to the frame.
Now just run your cables from the back of the board enclosure straight up and into your printhead!
